
Camera Settings
Here are some website suggestions to help you get started:
How to Photograph Northern Lights in 10 Easy Steps by Alaska Photo Treks
Shooting the Aurora Borealis (using film) by Dick Hutchinson
Fairbanks Aurora Tours helpful tips
Bonus: How to shoot the moon by Moon Giant
~Phone apps for night photography~
Some newer phones have manual settings, such as pro mode or night mode. That is all you need! Use similar settings as you would a camera. Knowing photography settings and about the exposure triangle will help you improve your shots. A tripod, or placing your phone on a surface is a must. Do not hold your phone in your hand. The phone camera needs to remain still for crisp, in-focus stars.
Apps can assist older phones, or less expensive phones, or if you prefer an app over the different modes. Camera apps help your cell phone take long exposure and special settings photography.
examples:
- Camera FV-5
- Night Camera
- NightCap
- DeepSky Camera
- Astrocam
How to take a photo using your phone? The same way as a camera! Adjust the settings on your phone or the app, just like you would a camera. See instructions below.
After reading the below instructions and familiarizing yourself with your camera and settings, go to the websites at the top of this page to help further your learning. Take a class on aurora photography, or join a photography tour group.
Using your phone, you may not get the results compared to a DSLR camera, but it is still good for social media snaps and just for checking if a faint aurora is out. Using a manual mode or night sky app makes taking pictures easier if you have no experience. Using night mode is great on bright auroras with moonlight on the landscape. Manual mode, or pro mode, is great on any night, but does better than night mode on dark nights.
Many photographers ignore tips and tricks for point and shoot users (cheap cameras) when they publish an article. Many dismiss your camera as not being good enough. Many also give wrong information about using your camera. Maybe they forgot how to use them (ha!)? The key to success with your camera is to BECOME AN EXPERT WITH YOUR CURRENT CAMERA BEFORE upgrading to an expensive one that is WAY more complicated to use! Your cheap little camera can capture the aurora as long as you can change the settings.
If you are wanting to take video of the aurora with your point and shoot camera, you will have to upgrade, as the technology for this isn’t quite there yet for most cameras (as of 2023). Some lower end cameras and phones can capture the aurora on video, but only when the aurora is very bright, and it is not the good quality video that you may see online. If you want to video and not time-lapse the aurora, you will need a camera that has a very high ISO, over 50,000, ideally over 100,000.
HOW TO USE YOUR CAMERA in MANUAL MODE for
AURORA PHOTOGRAPHY whether it is a DSLR or point and shoot:
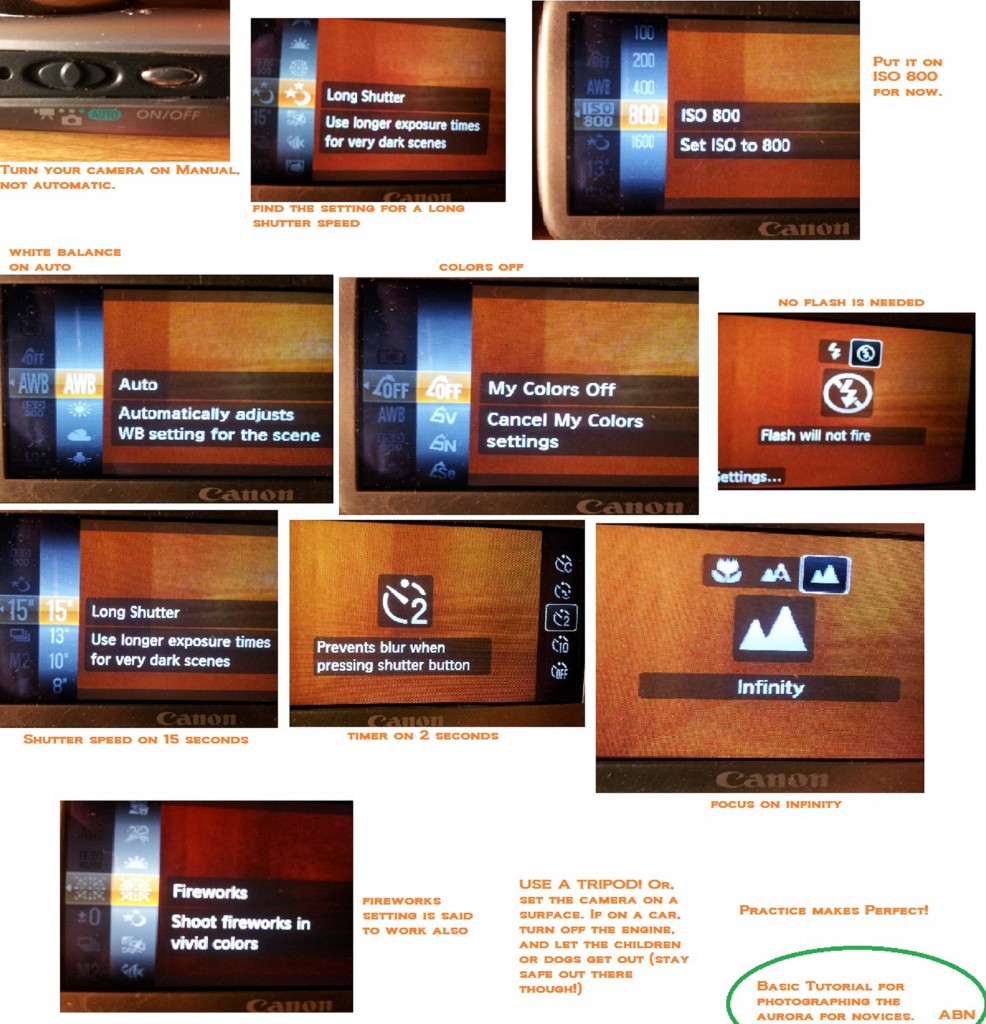
1. Turn your camera on Manual, not automatic. This may be marked “M” or “Manual”.
2. Point and shoot cameras are almost becoming obsolete as phone cameras are becoming standard. It is completely possible to use a point and shoot for aurora photography, as long as you can take manual photos with it. Any old camera, using film, or is digital camera is capable of shooting the aurora. If you have a Canon, you may see a setting called “Long Shutter”. For Nikon, this may say “Night Scene”. The name may be different on your camera but the symbol may be a moon. You might try fireworks setting for bright auroras.
3. Set your ISO to 800. After you get the hang of it, you can play around with the ISO to adjust what you like and what your camera is capable of. For now, just put it on 800 ISO. This is the minimum ISO number you need. You can go to a higher ISO, but it will depend on the shutter speed your camera is capable of. If you do not have a DSLR, you may not have the capability of taking a longer exposure.4. For the shutter speed, set it on 15″ (15 seconds). This number can also be changed according to the brightness of the aurora, or as you get the hang of what your camera can handle. Small, cheap cameras usually need this longer time. DSLR cameras (or the more expensive cameras, or cameras with faster lenses can capture aurora at far less than 15″. Give it a try. If it is very dark (no moon), try for even longer if your camera can do that.
5. Learn about the “exposure triangle”. Each aurora will present a different setting for your camera. Sometimes you will need a longer shutter speed, and sometimes the opposite. It depends on the brightness of the aurora, the landscape, and the moon. If you have a “fast lens” then you may be able to take a 1″ (1 second) photo. The exposure triangle will help you understand the balance you’ll need when taking night photos.
6. For the white balance (WB), keep it on AUTO for now. When you get the hang of what your camera can do, change up this setting to see how your night shots turn out. Use the K (Kelvin) setting to change up the temperature, depending how bright the aurora is. Practicing on the night sky with no aurora or city lights is a good idea to see what your camera can do.
7. If you have a colors setting, you can keep it off or turn it on vivid.
8. Set your focus to infinity. Sometimes this symbol looks like little mountains, or a sideways number 8. It is the opposite of macro, which is sometimes shown as a little flower symbol and means close-up. You want to focus on a far away object, like a star or a far off streetlight. It doesn’t matter if you want to take a picture of a person and the aurora. Do not focus on the person. Focus to infinity.
9. Put your self-timer on 2 seconds or 5 seconds, so that when you click the button, your camera won’t shake (both externally and internally) when the picture is taken. If you have a remote control shutter, then use it instead for even more shake control.
10. You must put your camera on a hard, unwavering surface or use a tripod. You can take a picture while holding your camera, but it will be blurry. If you place your camera on top of your car, turn off the engine, and the kids and dog should remain perfectly still (just get a tripod!)
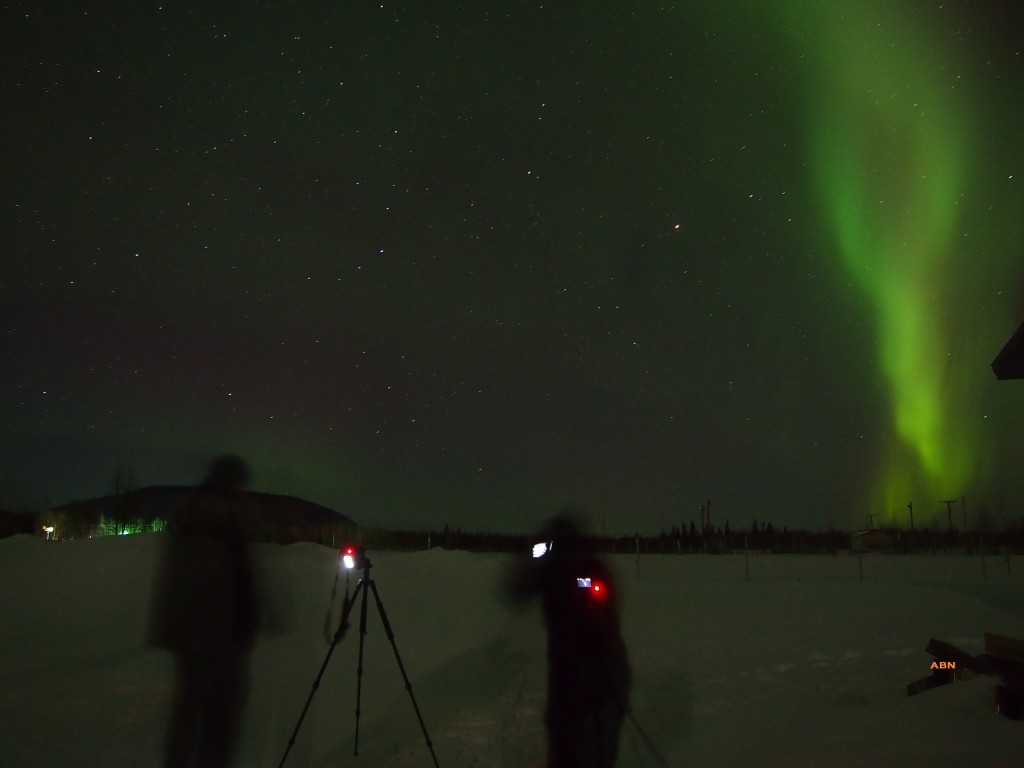
11. If there is light pollution between the camera and the aurora, your camera will pick it up. This will put too much light on your photo. Turn off all of your vehicle lights (and close the door — always have a spare set of keys in your pocket in the winter!), don’t point your phone light on your camera, etc.
Point and shoot cameras aren’t as plentiful anymore as cell phones become the norm for taking photos. But if you have one, this is a visual of what point and shoot camera settings may look like below. Similar settings can be converted to your phone.

Protect your camera from extreme arctic conditions with the Camera Parka.
Many aurora tour guides also give instructions on how to use your camera during the tour, even if it is not a photography tour. Some go into more details than others. Please ask your tour guide or see their websites for specifics.
Thankyou this is so useful